How to Make a Pop Up Card: A Step-by-Step Guide for Beginners

Sep
Creating a pop-up card is a fun and rewarding project for crafters of all skill levels. This guide will help beginners understand the steps needed to design and assemble unique pop-up cards that can brighten anyone’s day. From selecting materials to adding personal touches, you’ll learn everything you need to make your own delightful creations.
Key Takeaways
- Choose sturdy paper and essential tools for a successful card.
- Sketch your design before cutting to ensure a great pop-up effect.
- Use folding techniques to create a stable base for your card.
- Decorate with colors and patterns to enhance your pop-up image.
- Try different themes for various occasions to make your cards special.
Choosing the Right Materials for Your Pop Up Card

Creating a pop-up card is a delightful way to express creativity and share joy. To get started, it’s essential to choose the right materials that will make your card not only beautiful but also functional. The right materials can elevate your design and ensure your card lasts.
Selecting the Best Paper
When selecting paper for your pop-up card, consider the following:
- Weight: Thicker paper holds its shape better, while lighter paper is easier to fold.
- Texture: Smooth paper is great for printing, while textured paper adds a unique touch.
- Color: Choose colors that match your theme or occasion.
| Type of Paper | Weight (GSM) | Best For |
|---|---|---|
| Cardstock | 200-300 | Base and pop-up elements |
| Construction Paper | 120-180 | Colorful designs and layers |
| Specialty Paper | 150-250 | Unique textures and finishes |
Essential Tools and Supplies
To create your pop-up card, you will need:
- Scalpel or Craft Knife: For precise cuts.
- Cutting Mat: Protects your work surface.
- Scoring Tool: Helps make clean folds.
- Ruler: Ensures straight lines.
- Glue: A strong adhesive is essential for stability.
Decorative Elements to Consider
Adding decorative elements can make your card stand out. Here are some ideas:
- Stickers: Easy to apply and add fun designs.
- Markers or Paints: Personalize your card with drawings or messages.
- Ribbons and Glitter: Add texture and sparkle to your design.
Remember, the materials you choose can greatly impact the final look and feel of your pop-up card. Explore options from Cut Pop Up, where you can find beautifully crafted cards like the Camping and Fishing Holiday 3D Greeting Card and the BBQ Camping Holiday 3D Popup Greeting Card. These cards are hand-assembled with eco-friendly materials, ensuring quality and charm. Perfect for preserving holiday traditions and strengthening relationships!
Designing Your Pop Up Image

Creating a pop-up card is a delightful way to express your creativity. Cut Pop Up cards allow you to design intricate images that spring to life when the card is opened. Here’s how to get started:
Sketching Your Design
- Choose a Theme: Think about the occasion. Is it a birthday, holiday, or just a friendly hello? This will guide your design.
- Draw Your Image: Use a separate piece of decorative paper to sketch your pop-up image. Make sure it’s large enough to fit inside your card.
- Add Tabs: Draw small tabs on the sides of your image. These will help attach it to the card. Each tab should be about 1-2 centimeters wide.
Choosing a Theme
- Nature: Flowers, trees, or animals can bring a fresh feel.
- Celebrations: Think balloons or cakes for birthdays.
- Holidays: Use seasonal elements like snowflakes for winter or leaves for fall.
Incorporating Personal Touches
- Use Personal Photos: You can cut out parts of a photo to create a unique pop-up.
- Add Text: Write a special message or quote that resonates with the theme of your card.
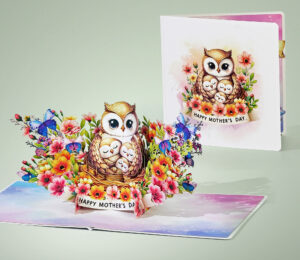
Remember, the beauty of pop-up cards lies in their details. The Green Hummingbird Pop Up Card from Cut Pop Up is a perfect example, featuring intricate designs that convey love and encouragement. Hand-assembled with eco-friendly printing, it’s ideal for various occasions and comes with a satisfaction guarantee.
By following these steps, you can create a stunning pop-up card that will surely impress your friends and family!
Cutting and Preparing the Card Base
Creating a pop-up card is a delightful way to express creativity and share joy. Cutting and preparing the card base is a crucial step in ensuring your design pops beautifully when opened. Here’s how to get started:
Folding Techniques
- Choose Your Paper: Select a sturdy paper that can hold its shape. Cardstock is a popular choice, but lighter paper can work for intricate designs.
- Make Precise Folds: Use a scoring tool or the edge of a ruler to create clean folds. This will help your card open and close smoothly.
- Create the Main Fold: This is the central fold of your card. Ensure it’s straight and aligns perfectly when the card is closed.
Creating the Pop Up Mechanism
- Design Your Pop-Up: Sketch your pop-up image on a separate piece of paper. Make sure it fits within the card when folded.
- Cut Carefully: Use a scalpel or craft knife for precise cuts. Remember, cuts should go from one valley fold to another, crossing the mountain fold in between.
- Test the Mechanism: Before finalizing, test how your pop-up works by gently opening and closing the card.
Ensuring Stability and Durability
- Reinforce Edges: Use glue or tape to secure the edges of your pop-up image to the card base. This will help it stay in place when the card is opened.
- Check for Stability: Make sure your pop-up stands upright and doesn’t wobble. Adjust as necessary to ensure it’s sturdy.
Remember, patience is key! The more care you take in cutting and preparing, the more impressive your pop-up card will be.
By following these steps, you’ll create a solid foundation for your pop-up card. If you’re looking for high-quality materials, consider exploring Cut Pop Up products. They offer a range of beautifully crafted cards that can inspire your next project!
Assembling the Pop Up Card
Creating a pop-up card is a delightful way to express creativity and share joy. Assembling your pop-up card is where the magic happens! This section will guide you through the essential steps to bring your design to life.
Attaching the Pop Up Image
- Prepare your pop-up image: Cut out your chosen design carefully. It could be anything from a heart to a cute animal. Make sure it fits well within the card.
- Glue the image: Open the card and apply a small amount of glue to the bottom of the tab. Press the pop-up image onto the tab and hold it for a few seconds to ensure it sticks well.
Aligning the Card Layers
- Layering: Take the second piece of paper you folded earlier. This will be the outer layer of your card.
- Positioning: Open the card with the pop-up image and place it inside the outer layer. Make sure everything is aligned properly before securing it.
Securing the Edges
- Final touches: Use a glue stick or double-sided tape to secure the edges of the card. This will help keep everything in place and ensure your pop-up card is sturdy.
- Let it dry: Allow the card to dry completely before handling it further.
As you assemble your card, remember that patience is key. Each step adds to the charm of your creation!
By following these steps, you can create a beautiful pop-up card that will surely impress anyone who receives it. If you’re looking for inspiration or ready-made designs, consider exploring Cut Pop Up products. Their hand-assembled cards are crafted with eco-friendly materials and come with a satisfaction guarantee, making them a perfect choice for any occasion!
Adding Decorative Details
Creating a pop-up card is not just about the mechanics; it’s also about the artistic flair you bring to it. Adding decorative details can transform a simple card into a memorable keepsake. Here’s how to enhance your pop-up card with style and creativity.
Using Colors and Patterns
- Choose a Color Palette: Select colors that complement your theme. For example, vibrant colors work well for birthday cards, while softer tones are great for sympathy cards.
- Patterns Matter: Incorporate patterns like stripes, polka dots, or floral designs to add depth. You can use decorative paper or even paint your own designs.
Adding Embellishments
- Stickers and Stamps: Use stickers or stamps to add fun elements. They can be thematic, like hearts for Valentine’s Day or spooky designs for Halloween.
- Ribbons and Bows: A simple ribbon can add elegance. Tie it around the card or use it to create a bow on the front.
- 3D Elements: Consider adding small 3D elements like buttons or beads for a tactile experience.
Writing a Personal Message
- Handwritten Notes: A personal touch goes a long way. Write a heartfelt message inside the card to make it special.
- Use Decorative Fonts: If you’re printing your message, choose a decorative font that matches the card’s theme.
Remember, the details matter! A well-decorated card not only looks good but also conveys your feelings more effectively.
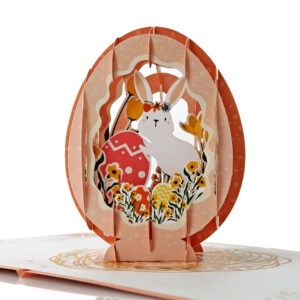
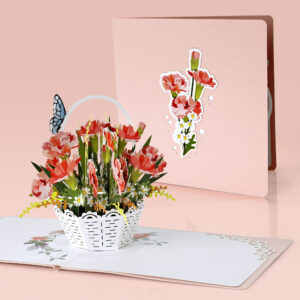
By focusing on these decorative aspects, you can create a pop-up card that is not only functional but also a piece of art. If you’re looking for inspiration, check out the Blood Moon Halloween 3D Card or the Flower Basket Full of Red Roses for Valentine’s Day from Cut Pop Up. These beautifully crafted cards feature intricate designs and vibrant finishes, perfect for any occasion!
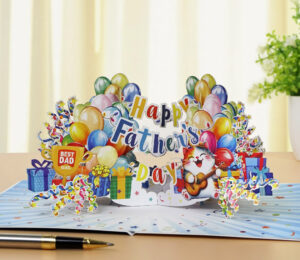
Creating Pop Up Cards for Different Occasions
Pop-up cards are a delightful way to celebrate special moments. They add a unique touch to any occasion, making your greetings memorable. Whether it’s a birthday, holiday, or anniversary, a pop-up card can bring joy and surprise to the recipient.
Birthday Pop Up Cards
Creating a birthday pop-up card is a fun way to show someone you care. You can choose themes like balloons, cakes, or even their favorite animal. Here are some ideas:
- Balloons: Bright and colorful, perfect for any age.
- Cakes: A classic choice that symbolizes celebration.
- Personal Touch: Add their name or age for a special touch.
Holiday Pop Up Cards
Holidays are a great time to send pop-up cards. They can capture the spirit of the season. For example:
- Christmas: A card featuring a Christmas tree or Santa can spread holiday cheer.
- Halloween: Cards with spooky designs can add fun to the season.
- Thanksgiving: Cards with autumn leaves or turkeys can express gratitude.
Special Event Pop Up Cards
For special events like weddings or graduations, pop-up cards can be a heartfelt gift. Consider:
- Weddings: A card with a couple or wedding bells can celebrate love.
- Graduations: A cap and diploma design can honor achievements.
Pop-up cards are not just cards; they are experiences that create lasting memories.
If you want to make your pop-up card even more special, consider using Cut Pop Up products. Their beautifully crafted designs, like the Anniversary 3D Greeting Card Popup Squirrel Couple, are perfect for any occasion. Each card is hand-assembled and features intricate details that will surely impress your loved ones. Plus, with free shipping on orders over $60, it’s a great time to explore their collection!
Tips for Beginners
Creating pop-up cards can be a delightful and rewarding experience. Here are some helpful tips to get you started on your journey:
Common Mistakes to Avoid
- Start simple: Don’t overwhelm yourself with complex designs right away. Begin with basic shapes and gradually add layers.
- Use the right tools: A good scalpel knife and a self-healing cutting mat are essential for clean cuts.
- Practice patience: Mistakes are part of the learning process. Take your time to perfect your technique.
Simple Designs to Start With
- Basic Shapes: Start with rectangles and triangles. These shapes can be transformed into various designs.
- Layering: Once comfortable, try adding layers to create depth in your cards.
- Personal Touches: Incorporate your own drawings or messages to make each card unique.
Resources for Inspiration
- Online Tutorials: Websites like Cardmaking Hub offer step-by-step guides to help you learn.
- Cut Pop Up Products: Explore the variety of pop-up card kits available. They provide a great way to practice and create beautiful cards without starting from scratch.
Remember, the joy of crafting comes from the process, not just the end result. Enjoy every step of creating your pop-up card!
Advanced Techniques for Pop Up Cards

Creating Pop Up Cards can be a delightful experience, especially when you explore advanced techniques that elevate your designs. Here, we’ll dive into some creative methods that can transform your cards into stunning works of art.
Layered Pop Up Designs
Layering is a fantastic way to add depth to your pop-up cards. By using multiple layers of paper, you can create a 3D effect that makes your images pop out even more. Here’s how to get started:
- Choose your base card: Start with a sturdy card stock.
- Cut out your layers: Use different colors or patterns for each layer to enhance visual interest.
- Assemble carefully: Use glue or double-sided tape to secure each layer, ensuring they align perfectly.
Interactive Elements
Adding interactive elements can make your pop-up cards even more engaging. Consider these ideas:
- Pull tabs: Create tabs that, when pulled, reveal hidden messages or images.
- Spinners: Incorporate a spinning element that adds movement to your design.
- Pop-up surprises: Design elements that spring up when the card is opened, creating a delightful surprise for the recipient.
Using Templates and Kits
For those who prefer a guided approach, using templates and kits can simplify the process:
- Find a template: Look for downloadable templates online that suit your theme.
- Purchase a kit: Many craft stores offer kits that include pre-cut pieces and instructions.
- Customize: Feel free to add your personal touch with colors, stickers, or handwritten notes.
Remember, the key to mastering these techniques is practice. The more you experiment, the more unique and beautiful your pop-up cards will become.
By exploring these advanced techniques, you can take your Pop Up Cards to the next level, impressing friends and family with your creativity and craftsmanship. If you’re looking for high-quality materials to get started, consider checking out Cut Pop Up products, which offer a range of supplies perfect for your next project!
Sharing and Preserving Your Pop Up Cards
Creating pop-up cards is not just about crafting; it’s about sharing joy and preserving memories. These delightful creations can be cherished keepsakes that bring smiles to friends and family. Sending a pop-up card is a heartfelt way to connect with loved ones.
Packaging and Mailing Tips
- Choose the Right Envelope: Use a sturdy envelope that fits your card snugly to prevent damage.
- Add Extra Padding: Consider using bubble wrap or tissue paper for added protection.
- Seal Securely: Make sure to seal the envelope well to keep your card safe during transit.
Storing Your Creations
- Keep Them Flat: Store your pop-up cards flat in a box to avoid bending or crushing.
- Avoid Moisture: Keep them in a dry place to prevent damage from humidity.
- Label for Easy Access: If you have many cards, label the boxes for easy retrieval.
Displaying Your Cards
- Create a Card Wall: Use clips or a string to hang your cards as a decorative display.
- Use a Stand: Consider using a small stand to showcase your favorite pop-up card on a desk or shelf.
- Rotate Regularly: Change the displayed cards to keep your decor fresh and exciting.
Pop-up cards are not just gifts; they are experiences that can be shared and cherished. Each card tells a story, making it a unique treasure.
Why Choose Cut Pop Up Products?
Cut Pop Up offers a variety of beautifully crafted pop-up cards that are perfect for any occasion. Our cards are hand-assembled with eco-friendly materials, ensuring quality and charm. For example, our Sun Flower Greeting Card with Hummingbird is designed to uplift and surprise, making it ideal for expressing love and encouragement. With a 100% satisfaction guarantee, you can trust that our products will delight your recipients. Explore our collection and find the perfect card to share your sentiments!
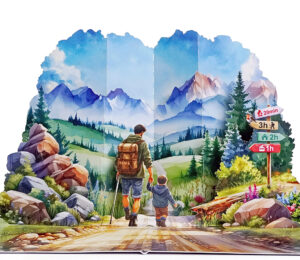
Exploring Pop Up Card Variations
Pop-up cards are not just ordinary greeting cards; they are a delightful surprise that can bring joy to any occasion. One exciting way to enhance your pop-up card experience is by exploring various cut pop-up designs. These creative designs can transform a simple card into a memorable keepsake.
3D Pop Up Cards
3D pop-up cards are a fantastic way to add depth and dimension to your creations. They can feature intricate designs that spring to life when the card is opened. For example, the Nativity Scene Greeting Card is a beautifully crafted 3D pop-up that captures the essence of Christmas. Made from premium paper, it includes a blank notecard for your personal message, making it perfect for the holiday season.
Origamic Architecture
Origamic architecture is a unique form of pop-up card design that combines art and engineering. This technique allows for stunning structures to emerge from a single sheet of paper. It’s a great way to impress your friends and family with your creativity. You can create everything from buildings to landscapes, all while keeping the card flat for easy storage.
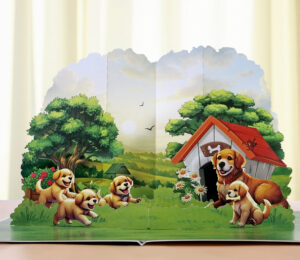
Pop Up Books and More
Pop-up books take the concept of pop-up cards to the next level. They can tell a story while providing a visual feast for the eyes. Imagine flipping through a book where each page reveals a new pop-up scene! This variation is perfect for children and adults alike, making reading an interactive experience.
Why Choose Cut Pop Up Products?
When considering pop-up cards, Cut Pop Up offers a range of beautifully designed options. Their products are hand-assembled by skilled craftsmen, ensuring high quality and attention to detail. Plus, they come with a 100% satisfaction guarantee. If you’re not happy with your purchase, they will refund your money.
Here’s a quick comparison of some popular Cut Pop Up products:
| Product Name | Description | Size | Price |
|---|---|---|---|
| Nativity Scene Greeting Card | 3D pop-up card featuring a nativity scene | 6″ x 8″ | $12.99 |
| 3D Pop-Up Red Rose Bouquet | Perfect for Valentine’s Day | 10″ x 12″ | $12.99 |
In conclusion, exploring pop-up card variations can open up a world of creativity and fun. Whether you’re making a card for a special occasion or just for fun, consider trying out different styles and techniques. Cut Pop Up products are a great way to start your journey into the world of pop-up cards!
Inspiration and Ideas for Your Next Project
Creating pop-up cards can be a delightful way to express your creativity. Cut Pop Up offers a unique approach to card making that combines art and fun. Here are some ideas to inspire your next project:
Nature-Inspired Designs
- Floral Themes: Use vibrant colors and intricate designs to create beautiful flower pop-ups. Consider using a hummingbird greeting card to convey love and encouragement.
- Animal Shapes: Incorporate animals like butterflies or birds to add a whimsical touch.
Geometric Patterns
- Simple Shapes: Start with basic shapes like triangles and squares. These can be layered to create depth and interest.
- Complex Designs: Once comfortable, try more intricate geometric patterns that pop out when the card is opened.
Seasonal Themes
- Holidays: Create cards for various holidays, such as Halloween or Christmas, using themed decorations.
- Birthdays: Design fun birthday cards featuring balloons or cakes that spring to life when opened.
Remember, the key to a successful pop-up card is to start simple and gradually add layers. This approach not only makes the process enjoyable but also allows for creativity to flourish.
By exploring these ideas, you can create stunning pop-up cards that will surely impress your friends and family. If you’re looking for high-quality materials, consider Cut Pop Up products, which are hand-assembled and eco-friendly, ensuring your creations are both beautiful and sustainable!
Looking for fresh ideas for your next project? Dive into our collection of unique inspirations that can spark your creativity! Whether you’re planning a birthday surprise or a special occasion, we have something for everyone. Don’t miss out—visit our website today to explore more!
Final Thoughts on Crafting Pop-Up Cards
Creating pop-up cards is not just a fun craft; it’s a way to express your feelings and creativity. Whether you’re making a card for a birthday, a holiday, or just to say hello, these cards add a special touch that can brighten someone’s day. Remember, the best part of making these cards is letting your imagination run wild. So gather your materials, follow the steps, and enjoy the process. You’ll be amazed at how a simple piece of paper can turn into a delightful surprise for someone you care about!
Frequently Asked Questions
What materials do I need to make a pop-up card?
You’ll need sturdy paper, scissors, glue, and some decorative items like stickers or markers.
Is it hard to create a pop-up card?
Not at all! If you follow simple steps, it’s easy and fun, even for beginners.
Can I use regular paper for pop-up cards?
You can, but thicker paper works better to support the pop-up features.
What are some themes I can use for my pop-up card?
You can choose themes like birthdays, holidays, or even nature!
How can I decorate my pop-up card?
Use colors, patterns, stickers, or even handwritten messages to make it special.
Are there templates available for pop-up cards?
Yes, many websites offer free templates you can print out and use.
Can kids make pop-up cards?
Absolutely! It’s a great craft for kids with adult supervision.
How do I ensure my pop-up card stays stable?
Make sure to fold and cut carefully, and use sturdy paper to keep it from falling apart.

Your post is fantastic, and I appreciate it. The data you supplied was both practical and simple to grasp. Your ability to simplify otherwise difficult ideas is much appreciated. Anyone interested in learning more about this subject would benefit greatly from reading this.
What an outstanding work! Anyone interested in the topic will find it a must-read due to your interesting writing style and excellent research. Your inclusion of examples and practical ideas is really appreciated. I appreciate you taking the time to share your wise words.