Create Your Own Pop Up Christmas Tree Card DIY: A Step-by-Step Guide
Making your own pop-up Christmas tree card is a fun and creative way to spread holiday cheer. This DIY project allows you to express your artistic side while creating a delightful card that friends and family will love. In this guide, you’ll find everything you need to know to craft your own unique card, from gathering materials to adding personal touches.
Key Takeaways
- Gather basic materials like cardstock, scissors, and glue.
- Learn simple folding techniques to create a sturdy card base.
- Design your tree with layers for added depth and dimension.
- Assemble the pop-up mechanism carefully for a smooth action.
- Personalize your card with messages and decorations to make it special.
Gathering Your Materials for the Pop Up Christmas Tree Card

Creating your own Christmas pop up cards is a delightful way to spread holiday cheer. To get started, you’ll need to gather some essential materials and tools. Here’s a breakdown of what you’ll need:
Essential Tools and Supplies
- Thick Card: This will be the base of your card. Choose a sturdy card to ensure it holds up well.
- Colored Paper: Use leftover Christmas wrapping paper or colored paper for the tree layers. Red, green, and gold are great choices!
- Glue and Scissors: These are crucial for assembling your card. Hot glue works well, but a glue stick is safer for kids.
Choosing the Right Paper
When selecting paper, consider the following:
- Thickness: Thicker paper will provide better support for your pop-up elements.
- Color and Pattern: Choose colors that complement each other. For example, red and green or gold and silver can create a festive look.
- Texture: Adding textured paper can enhance the visual appeal of your card.
Optional Decorative Elements
To make your card truly unique, consider adding:
- Glitter: A sprinkle of glitter can add sparkle to your card.
- Stickers: Christmas-themed stickers can be a fun addition.
- Personal Touches: Incorporate photos or drawings to make the card special.
Remember, crafting is not just about the end product; it’s about enjoying the process and creating something meaningful.
Gathering these materials is the first step in making a memorable pop-up card that your friends and family will cherish. With the right supplies, you can create a card that not only looks great but also carries a heartfelt message. Let’s dive into the crafting process!
Crafting the Base of Your Card
Creating a sturdy base is essential for your pop-up Christmas tree card. This section will guide you through the steps to ensure your card stands out and holds its shape. A strong base is key to a successful pop-up card!
Folding Techniques for a Strong Base
- Start with a thick piece of card, ideally in a festive color.
- Fold the card in half to create a portrait orientation. This will be the main structure of your card.
- Make sure the fold is crisp by running a ruler along the edge or pressing down firmly with your fingers.
Cutting the Card to Size
- Use scissors to trim the card to your desired dimensions. A standard size is 5 x 7 inches, but feel free to customize it.
- If you want to add a decorative border, consider cutting the edges with decorative scissors for a unique touch.
Ensuring Stability and Balance
- To keep your card upright, ensure that the base is wider than the pop-up elements. This will help prevent it from tipping over.
- You can add extra layers of card at the bottom for added weight and stability.
Crafting your card with care not only enhances its appearance but also makes it a meaningful gift. Personal touches can create magical moments that last a lifetime, especially during the festive season.
By following these steps, you’ll create a solid foundation for your pop-up Christmas tree card, ready to be filled with joy and creativity!
Designing the Pop Up Christmas Tree
Creating the Tree Layers
To make your pop-up Christmas tree truly stand out, you’ll want to create multiple layers. Here’s how to do it:
- Cut several rectangles from colored paper, ensuring each one is slightly larger than the last.
- Fold each rectangle in a zigzag pattern to create a fan shape. This will give your tree depth and dimension.
- Glue the edges of the zigzag folds together to secure them.
Using Templates for Precision
If you want to ensure your layers are uniform, consider using templates. You can find various DIY Christmas pop-up tutorials online that provide templates for different tree designs. This can help you achieve a more polished look.
Adding Texture and Dimension
To make your tree even more festive, think about adding texture:
- Use glitter or metallic paper for a sparkling effect.
- Incorporate different materials like felt or fabric for a cozy feel.
- Add small decorations like beads or sequins to enhance the visual appeal.
Crafting a pop-up card is not just about the final product; it’s about the joy of creating something special for your loved ones. A handmade card can convey heartfelt emotions that store-bought cards often lack.
By following these steps, you can create a beautiful pop-up Christmas tree card that will surely delight anyone who receives it!
Assembling the Pop Up Mechanism

Aligning the Tree with the Card
To create a stunning pop-up Christmas tree card, start by aligning the tree layers with the card base. Position the smallest layer at the top and gradually work your way down to the largest layer. This ensures that your tree has a natural look and stands tall when the card is opened.
Securing the Pop Up Elements
Once you have aligned the layers, it’s time to secure them. Use glue to attach one side of each fan layer to the card. Make sure the fold of the fan aligns with the center fold of the card. Here’s a quick checklist for securing your pop-up elements:
- Apply glue evenly to avoid mess.
- Hold each layer for a few seconds to ensure it sticks well.
- Check that the layers are evenly spaced for a balanced look.
Testing the Pop Up Action
After securing all layers, gently open and close the card to test the pop-up action. It should smoothly rise and fall without any snags. If it doesn’t pop up correctly, you may need to adjust the layers or add more glue.
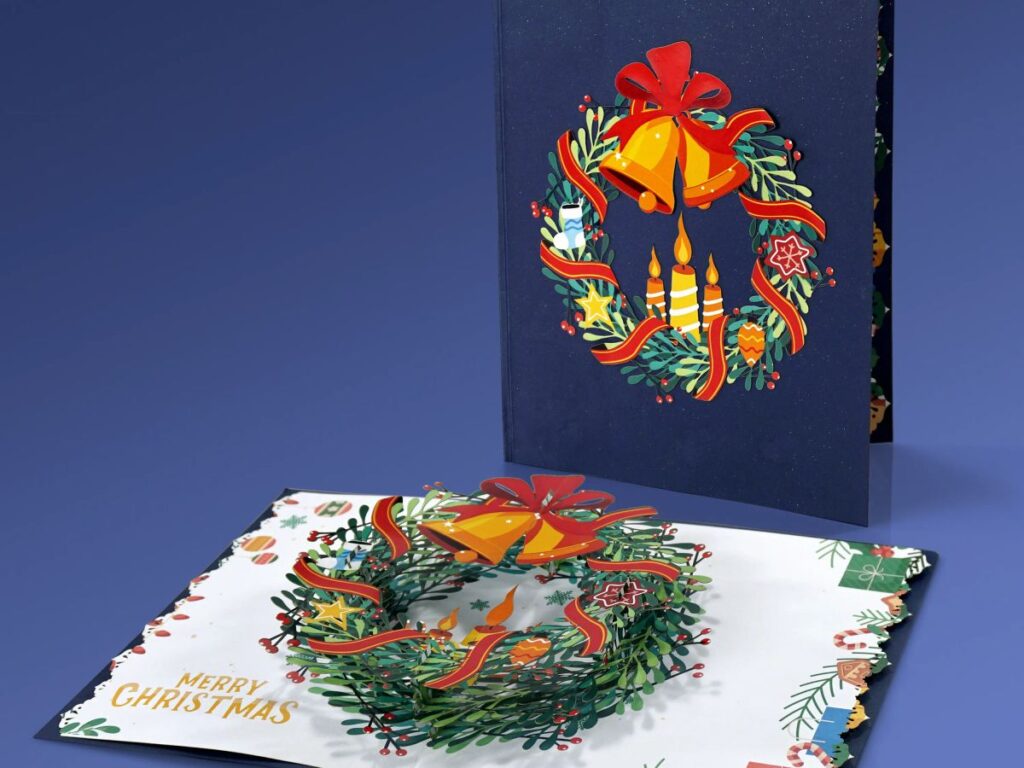
Crafting a pop-up card is not just about the mechanics; it’s about creating a meaningful gift that brings joy to the recipient. With Cut Pop Up, you can customize and design any Christmas card ideas that pop up beautifully!
Personalizing Your Christmas Card
Creating a unique Christmas card is a wonderful way to show your loved ones that you care. Personal touches make your card special and memorable. Here are some ideas to help you personalize your pop-up Christmas tree card:
Adding Personal Messages
- Write a heartfelt message inside the card. This could be a simple holiday greeting or a personal note about your year.
- Consider including a favorite memory you share with the recipient.
- Use fun and colorful pens to make your message stand out.
Incorporating Photos or Drawings
- Attach a small photo of you and your family to the card. This adds a personal touch that recipients will cherish.
- Encourage kids to draw festive pictures or decorations on the card. Their creativity can bring joy to the card.
- Use stickers or printed images to enhance the design.
Using Glitter and Other Embellishments
- Add some sparkle with glitter glue. It can be used to create stars or snowflakes on your card.
- Consider using ribbons or small ornaments to decorate the card further.
- You can also use colored paper to create additional layers or shapes that pop out when the card is opened.
Personalizing your card not only makes it unique but also shows the recipient how much you care. Each card can be a reflection of your creativity and love, making it a cherished gift during the holiday season.
By following these tips, you can create a pop-up Christmas card that is not just a card but a heartfelt gift that your loved ones will treasure for years to come!
Tips for a Professional Finish

Creating a pop-up Christmas tree card can be a delightful experience, but to make it truly stand out, consider these professional tips:
Avoiding Common Mistakes
- Plan your design: Sketch your card layout before cutting to avoid errors.
- Use quality materials: Choose sturdy paper to prevent tearing during assembly.
- Test your folds: Make sure your folds are crisp and even for a neat finish.
Ensuring Clean Cuts and Folds
- Use sharp scissors: Dull scissors can lead to jagged edges.
- Measure twice, cut once: This old saying holds true; double-check your measurements.
- Practice folding: If you’re unsure, practice on scrap paper first.
Final Quality Checks
- Inspect your card: Look for any glue smudges or uneven edges before finishing.
- Test the pop-up action: Ensure the tree pops up smoothly without any snags.
- Add a personal touch: A handwritten note or signature can make your card even more special.
Crafting your own pop-up card is not just about the final product; it’s about the joy of creating something meaningful. This guide provides a step-by-step approach to creating stunning pop-out Christmas cards.
Sharing Your Handmade Card
Creating a pop-up Christmas card is not just about crafting; it’s about sharing joy and love during the holiday season. Handmade cards carry a personal touch that store-bought ones simply can’t match. Here are some ways to share your beautiful creations:
Packaging for Mailing
- Use sturdy envelopes to protect your card during transit.
- Consider adding a layer of bubble wrap for extra cushioning.
- Seal the envelope securely to prevent it from opening.
Presenting in Person
- Hand-deliver your card to friends and family for a more personal touch.
- Pair the card with a small gift or treat to make the moment even more special.
- Share the story behind your card-making process to engage your recipient.
Inspiring Others with Your Craft
- Share photos of your card on social media to inspire others.
- Host a crafting session with friends or family to teach them how to make their own pop-up cards.
- Encourage others to personalize their cards, just like you did with yours.
Remember, each card you create is a unique expression of your creativity and love. By sharing your handmade cards, you not only spread holiday cheer but also inspire others to embrace their own creativity. With the right materials and a little imagination, anyone can create a memorable keepsake for the holiday season!
Once you’ve crafted your unique handmade card, it’s time to share it with the world! Show off your creativity and inspire others by posting a picture on social media. Don’t forget to visit our website for more ideas and supplies to keep your crafting journey going!
Final Thoughts on Your DIY Pop-Up Christmas Tree Card
Creating your own pop-up Christmas tree card is not just a fun craft; it’s a wonderful way to share joy and creativity with your loved ones. By following the simple steps outlined in this guide, you can make a unique card that adds a personal touch to your holiday greetings. Whether you’re crafting with kids or making one for yourself, this project brings the spirit of Christmas to life. So gather your materials, unleash your imagination, and enjoy the process of making something special that will surely bring smiles to those who receive it.
Frequently Asked Questions
What materials do I need to make a pop-up Christmas tree card?
To create a pop-up Christmas tree card, you will need some card stock, scissors, glue, and decorative items like markers or glitter.
Can I use any type of paper for this project?
Yes, you can use any paper you have at home, including colored paper, wrapping paper, or even plain printer paper.
How do I make the tree stand up inside the card?
You can make the tree stand up by creating layers of paper that are glued together in a zigzag shape, which will pop up when the card is opened.
Is this a good project for kids?
Absolutely! This is a fun and easy craft for kids, but younger ones may need some help with cutting and gluing.
How long does it take to make a pop-up Christmas tree card?
It usually takes about 15-30 minutes to complete the card, depending on how detailed you want it to be.
Can I add personal touches to the card?
Yes! You can write messages, add photos, or use stickers and glitter to make your card unique.

Thank you for another informative blog. Where else could I get that kind of information written in such an ideal way? I’ve a project that I am just now working on, and I have been on the look out for such information.