A Beginner’s Guide: How to Make Pop Up Card Easy for Any Occasion
Creating pop-up cards can be a fun and rewarding craft for anyone, especially beginners. Whether you’re making a card for a birthday, holiday, or just to say hello, this guide will help you understand the basics of making these delightful cards. You’ll learn about materials, techniques, and get inspired with creative ideas to make your pop-up cards stand out.
Key Takeaways
- Choose sturdy cardstock for the best results.
- Basic tools like scissors and glue are essential for crafting.
- Start with simple designs to build your confidence.
- Decorate your cards with fun elements like stickers and glitter.
- Practice makes perfect; don’t be afraid to try new things!
Choosing the Right Materials for Your Pop-Up Card

Creating pop-up cards is a delightful way to express your creativity and make special moments even more memorable. Cut Pop Up cards are a fantastic option for anyone looking to add a unique touch to their card-making. Here’s what you need to know about selecting the right materials for your pop-up card project.
Selecting the Best Cardstock
When it comes to cardstock, you want something that is sturdy yet flexible. Here are some options:
- Standard Cardstock: Great for beginners, available in various colors.
- Glitter Cardstock: Adds sparkle and fun to your designs.
- Recycled Cardstock: An eco-friendly choice that doesn’t compromise on quality.
Essential Tools You Will Need
To make your pop-up card, you’ll need a few essential tools:
- Scissors: For cutting out shapes and tabs.
- Glue Stick: To securely attach your elements.
- Ruler and Pencil: For measuring and marking cuts accurately.
Optional Decorative Elements
Once you have your base materials, consider adding some decorative elements:
- Markers and Crayons: For personalizing your card with drawings or messages.
- Stickers and Ribbons: To enhance the visual appeal.
- Glitter and Sequins: For that extra sparkle!
Remember, the right materials can make all the difference in your pop-up card’s final look. With Cut Pop Up products, you can easily create beautiful cards that stand out for any occasion. Whether it’s a birthday, holiday, or just a simple greeting, these materials will help you craft something special!
Basic Techniques to Get You Started
Creating pop-up cards can be a fun and rewarding experience. With just a few simple techniques, you can bring your cards to life! Here are some essential skills to help you get started:
Folding and Creasing
Folding is the foundation of any pop-up card. Here’s how to do it right:
- Use a bone folder for crisp folds.
- Score your lines before folding to make it easier.
- Practice different types of folds, like mountain and valley folds.
Cutting Out Shapes
Cutting shapes is where your creativity shines. Follow these steps:
- Choose your design and draw it on the cardstock.
- Use sharp scissors or a craft knife for clean edges.
- Remember to cut slowly and carefully to avoid mistakes.
Creating Tabs and Slots
Tabs and slots are crucial for making your pop-up elements stand out. Here’s how:
- Cut slits in your card where you want the pop-up to be.
- Create tabs by cutting small rectangles that can be folded and inserted into the slits.
- Test the movement of your pop-up to ensure it works smoothly.
Crafting pop-up cards is not just about the end product; it’s about enjoying the process and expressing your creativity.
By mastering these basic techniques, you’ll be well on your way to creating stunning pop-up cards for any occasion. If you’re looking for creative ways to learn how to make pop-up cards for birthday celebrations, consider exploring Cut Pop Up products for high-quality materials and tools that can enhance your crafting experience!
Step-by-Step Guide to Making a Simple Pop-Up Card
Creating a pop-up card is a fun and engaging way to express your creativity. Cut Pop Up cards are not just ordinary cards; they bring a delightful surprise to any occasion. Here’s a simple guide to help you get started!
Preparing Your Card Base
- Choose Your Cardstock: Select two pieces of cardstock in colors that complement each other. One will be the outer card, and the other will be the inner pop-up element.
- Fold the Card: Fold the outer cardstock in half to create the card base. Make sure the crease is sharp for a neat finish.
- Cut the Inner Card: Take the second piece of cardstock and cut it slightly smaller than the outer card. This will be the pop-up section.
Designing the Pop-Up Element
- Create Tabs: On the inner card, make two parallel cuts about 1 inch long on the folded side. These cuts will create tabs that will pop up when the card is opened.
- Fold the Tabs: Open the card and fold the tabs inward. This will create the pop-up effect when the card is closed and then opened again.
- Decorate the Tabs: You can add drawings, stickers, or other decorative elements to the tabs to make them more visually appealing.
Assembling the Card
- Glue the Inner Card: Apply glue to the back of the inner card and attach it to the inside of the outer card, ensuring the tabs are positioned correctly.
- Close and Press: Close the card and press down to secure the glue. This will help the tabs stay in place.
- Final Touches: Add any additional decorations to the outer card, such as messages or embellishments, to personalize it further.
Crafting pop-up cards is a wonderful way to connect with your loved ones. Each card you create can be a unique expression of your feelings, making it a cherished gift.
With these steps, you can create a simple yet stunning pop-up card that will surely impress anyone who receives it. Remember, the key to a great pop-up card is creativity and a little bit of practice!
Creative Ideas for Pop-Up Card Themes
Pop-up cards are a delightful way to express creativity and add a special touch to any occasion. With endless themes to choose from, you can make each card unique and personal. Here are some fun ideas to inspire your next pop-up card project:
Birthday Celebrations
- Birthday Cake: Create a pop-up cake that opens up to reveal layers and candles.
- Balloons: Use colorful balloons that pop up when the card is opened.
- Party Hats: Design a card with hats that spring up, perfect for a festive feel.
Holiday Festivities
- Christmas Tree: A pop-up tree adorned with ornaments can bring holiday cheer.
- Halloween Ghosts: Surprise your friends with spooky ghosts that pop out.
- Thanksgiving Turkey: A fun turkey design can make your Thanksgiving cards special.
Special Occasions
- Wedding Bells: Celebrate love with a pop-up of wedding bells or a cake.
- Graduation Cap: A cap that pops up can be a great way to congratulate a graduate.
- Baby Shower: Create a card with baby items like bottles or strollers that pop out.
Crafting pop-up cards is not just about the design; it’s about the joy they bring to the recipient. Each card can tell a story and create lasting memories.
For those looking to elevate their card-making experience, consider exploring Cut Pop Up products. These tools and templates can help you master the art of pop-up cards, making it easier to create stunning designs for any occasion. Whether you’re a beginner or an experienced crafter, Cut Pop Up offers resources that can enhance your creativity and simplify the process. Why not give it a try?
Advanced Techniques for Intricate Designs
Creating pop-up cards can be a delightful experience, especially when you dive into advanced techniques that add depth and creativity to your designs. One exciting method is the Cut Pop Up, which allows you to craft intricate designs that truly stand out. This technique not only enhances the visual appeal of your cards but also makes them more interactive and engaging.
Layering Multiple Pop-Up Elements
- Start Simple: Begin with basic shapes and gradually add layers.
- Use Contrasting Colors: This helps each layer pop and adds visual interest.
- Experiment with Heights: Varying the height of each layer creates a dynamic look.
Incorporating Movable Parts
- Add Fun Elements: Consider adding parts that move, like flaps or sliders.
- Use Brads or Washers: These can help create pivot points for your movable parts.
- Test for Functionality: Ensure that all moving parts work smoothly before finalizing your design.
Adding Special Effects
- Use Glitter or Foil: These materials can add sparkle and shine to your cards.
- Incorporate Textures: Use different materials like fabric or embossed paper for a tactile experience.
- Play with Light: Consider using translucent paper to create effects with light.
Crafting intricate pop-up cards is not just about the final product; it’s about enjoying the process and expressing your creativity. Cut Pop Up products can help you explore these advanced techniques, making your crafting journey even more enjoyable.
By mastering these techniques, you can elevate your pop-up card-making skills and impress your friends and family with your creativity. Whether it’s for a birthday celebration or a special occasion, your cards will surely leave a lasting impression!
Tips for Crafting with Kids

Crafting pop-up cards is a wonderful way to bond with children while sparking their creativity. Here are some helpful tips to make the experience enjoyable and safe:
Safety First
- Always supervise children while they use scissors.
- Use child-safe scissors for younger kids.
- Keep small decorative items like glitter and sequins out of reach to prevent choking hazards.
Simple Designs for Little Hands
- Start with easy shapes like hearts or stars.
- Use templates to guide their cutting and folding.
- Encourage them to personalize their cards with drawings or stickers.
Making It a Fun Activity
- Set up a crafting station with all materials ready.
- Play some fun music to create a lively atmosphere.
- Celebrate their creations by displaying them around the house.
Crafting pop-up cards not only enhances creativity but also strengthens family bonds. It’s a delightful way to create lasting memories together!
By introducing kids to the world of pop-up cards, you open up a realm of creative ideas for do-it-yourself pop-up cards. With Cut Pop Up products, you can easily find templates and kits that make crafting even more accessible and fun. Why not explore these options to enhance your crafting experience?
Decorating Your Pop-Up Card
Creating a pop-up card is not just about the mechanics; it’s also about adding your personal touch. Once you have your card assembled, it’s time to let your creativity shine! Here are some fun ways to decorate your pop-up card:
Using Markers and Crayons
- Colorful Designs: Use markers or crayons to draw fun patterns or messages on the card.
- Personal Touch: Write a heartfelt note or doodle something special for the recipient.
- Layering Colors: Experiment with different colors to make your card vibrant and eye-catching.
Adding Glitter and Sequins
- Sparkle Effect: Glue glitter to certain areas to make your card sparkle.
- 3D Elements: Use sequins to create a three-dimensional effect that catches the light.
- Theme Matching: Choose colors that match the theme of your card for a cohesive look.
Incorporating Stickers and Ribbons
- Fun Stickers: Stickers can add a playful element to your card. Choose ones that fit the occasion, like birthday cakes or hearts.
- Ribbons for Texture: Add ribbons to the edges or as bows to give your card a textured feel.
- Layering Elements: Combine stickers and ribbons for a more dynamic design.
Remember, the goal is to have fun and express your creativity! Whether you’re making a card for a birthday or just because, your unique style will make it special.
By using these decorating techniques, you can transform a simple pop-up card into a stunning piece of art. If you want to try crafting your own custom pop-up cards, have a look at our free templates. Print them off and follow our step-by-step instructions. Then, impress your friends and family with your creations!
Troubleshooting Common Issues
Creating pop-up cards can be a delightful experience, but sometimes things don’t go as planned. Here are some common issues you might face and how to fix them:
Fixing Misaligned Cuts
- Check your measurements: Ensure that your cuts are precise. If they are off, the pop-up element may not align properly.
- Use a straight edge: A ruler can help you make straight cuts, which is crucial for a clean look.
- Practice on scrap paper: Before cutting your final card, practice on a piece of scrap paper to avoid mistakes.
Strengthening Weak Folds
- Reinforce with tape: If your folds are weak, consider using tape on the inside to add strength.
- Use thicker cardstock: Thicker materials can hold their shape better and prevent tearing.
- Score before folding: Scoring the paper lightly before folding can help create a cleaner, stronger fold.
Ensuring Smooth Pop-Up Action
- Test the mechanism: After assembling, open and close the card several times to ensure the pop-up element works smoothly.
- Adjust the tabs: If the pop-up doesn’t rise correctly, check the tabs and slots to ensure they are cut and positioned properly.
- Use strong adhesive: Make sure to use a strong glue that can hold the pop-up elements securely in place.
Remember, crafting is about creativity and fun! Don’t be afraid to experiment and make adjustments as needed. If you encounter issues, consider exploring Cut Pop Up products, which offer innovative designs and materials that can simplify your crafting experience. With the right tools and techniques, you can create stunning pop-up cards for any occasion!
Creating Custom Envelopes for Your Pop-Up Cards
When it comes to sending your beautifully crafted pop-up cards, a custom envelope can make all the difference. Not only does it protect your card, but it also adds a personal touch that shows you care. Here’s how to create your own envelopes that perfectly fit your pop-up creations.
Measuring and Cutting the Envelope
- Measure your card: Start by measuring the dimensions of your pop-up card. This will help you determine the size of your envelope.
- Choose your paper: Select a sturdy paper that complements your card design. You can use colored or patterned paper for a fun look.
- Cut the paper: Cut a rectangle that is slightly larger than your card. This will allow for a snug fit.
Decorating the Envelope
- Personalize it: Use markers, stickers, or stamps to decorate the envelope. This adds a unique flair that reflects your style.
- Add a liner: Consider adding a decorative liner inside the envelope for an extra surprise when the recipient opens it.
- Seal it creatively: Use washi tape or a decorative sticker to seal the envelope, making it look even more special.
Sealing and Addressing
- Seal securely: Make sure the envelope is sealed well to protect your card during transit.
- Address it: Write the recipient’s address clearly on the front. You can also add a return address for convenience.
Crafting your own envelopes is not only easy and affordable, but it also allows you to express your creativity. With just a few simple steps, you can create custom envelopes that perfectly match your pop-up cards!
Inspiration from Professional Pop-Up Card Makers
Showcasing Unique Designs
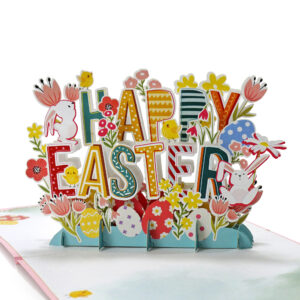
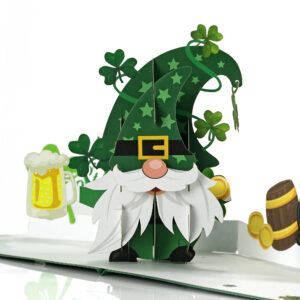
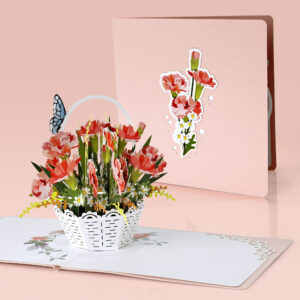
Pop-up cards are not just simple greetings; they are creative expressions that can surprise and delight. Many professional pop-up card makers, like Keith Allen, have mastered the art of transforming ordinary cards into extraordinary experiences. Their designs often feature intricate details and clever mechanisms that make the card come alive.
Learning from the Experts
To truly appreciate the craft, it’s essential to learn from those who excel in it. Resources like Mastering the Art of Pop-Up Card provide a comprehensive guide on how to create stunning 3D creations. This guide covers everything from basic techniques to advanced designs, ensuring that both beginners and seasoned crafters can find inspiration and improve their skills.
Incorporating Professional Tips
Here are some tips from the pros to elevate your pop-up card making:
- Experiment with different materials: Use various types of cardstock and decorative elements to add depth.
- Practice basic techniques: Mastering folds, cuts, and slots will enhance your designs.
- Add personal touches: Incorporate unique elements that reflect the recipient’s personality or interests.
Crafting pop-up cards is not just about the final product; it’s about the joy of creating something special for someone you care about.
By exploring the world of professional pop-up card makers, you can find endless inspiration and techniques to make your own cards truly unique. Whether it’s for a birthday, holiday, or just because, let your creativity shine!
Sustainable Crafting Practices

Creating pop-up cards can be a delightful experience, and it can also be eco-friendly! By choosing sustainable materials and methods, you can enjoy crafting while caring for our planet. Here are some practices to consider:
Using Recycled Materials
- Opt for recycled cardstock: This helps reduce waste and supports an environmentally friendly way of living.
- Repurpose old cards: Use parts of old cards to create new designs, giving them a second life.
- Collect scrap paper: Small pieces can be used for decorations or pop-up elements.
Minimizing Waste
- Plan your designs: Sketch your ideas before cutting to avoid unnecessary waste.
- Use templates: This ensures you cut only what you need, reducing leftover materials.
- Save scraps: Keep all leftover pieces for future projects or smaller crafts.
Eco-Friendly Decoration Options
- Natural dyes: Use plant-based dyes for coloring your cards instead of synthetic ones.
- Biodegradable glitter: If you want to add sparkle, choose biodegradable options.
- Organic embellishments: Consider using items like dried flowers or leaves for a unique touch.
Crafting with sustainability in mind not only benefits the environment but also adds a personal touch to your creations. Cut Pop Up products are designed with eco-friendly materials, making them a great choice for your next project!
By embracing these sustainable practices, you can create beautiful pop-up cards that are not only fun to make but also kind to our planet. Let’s craft with care!
Crafting sustainably is not just a trend; it’s a way to care for our planet. By using eco-friendly materials and methods, you can create beautiful items while helping the environment. Want to learn more about how to make a difference? Visit our website for tips and ideas on sustainable crafting!
Wrapping It Up: Your Journey into Pop-Up Cards
Creating pop-up cards is not just a fun craft; it’s a way to express your feelings and creativity. Whether you’re making a card for a birthday, a holiday, or just to say "I care," these cards add a special touch that can brighten anyone’s day. Remember, the best part is that you can let your imagination run wild! Start with simple designs and gradually try more complex ones as you gain confidence. Don’t forget to enjoy the process and share your creations with friends and family. So grab your scissors and colorful paper, and dive into the wonderful world of pop-up cards!
Frequently Asked Questions
What materials do I need to make a pop-up card?
You will need cardstock, scissors, glue, and optionally, markers or decorative items like stickers.
Are pop-up cards difficult to make?
Not at all! With some basic steps, even beginners can create beautiful pop-up cards.
Can kids help with making pop-up cards?
Yes! It’s a fun activity for kids, but make sure to supervise them while using scissors.
What occasions are pop-up cards good for?
You can use pop-up cards for birthdays, holidays, or any special event.
How do I ensure my pop-up card opens correctly?
Make sure to fold and cut accurately. Test the card after assembling to check the pop-up action.
Can I decorate my pop-up card?
Absolutely! You can use markers, glitter, and other craft supplies to make it unique.
What if my cuts are not straight?
If your cuts aren’t straight, try using a ruler next time or adjust the design to hide the imperfections.
Where can I find templates for pop-up cards?
You can find free templates online or create your own based on your ideas.

This is a great post, I’ve already recommended it to others.