How to Make a Pop Up Card Step by Step: A Creative Guide for Beginners
Oct
Making pop-up cards is a fun and creative way to express your feelings for any occasion. This guide will take you through the steps to create your own unique pop-up card, whether you’re a beginner or looking to refine your skills. With simple materials and techniques, you can craft cards that will surprise and delight your friends and family.
Key Takeaways
- Choose sturdy paper and colorful supplies for your card.
- Plan your design carefully to ensure a successful pop-up effect.
- Practice basic cutting and folding techniques for best results.
- Add fun decorations to make your card special and personal.
- Don’t be afraid to try advanced techniques as you gain confidence.
Choosing the Right Materials for Your Pop Up Card
Creating a pop-up card is a delightful way to express your creativity. Choosing the right materials is essential for making your card stand out. Here’s a breakdown of what you’ll need:
Selecting the Best Paper
- Cardstock: This sturdy paper is perfect for card bases and layers. It holds its shape well, making it ideal for pop-ups.
- Decorative Paper: You can use colorful or patterned paper to add flair to your design. Just ensure it’s not too thick, as it may complicate folds.
- Draft Paper: Regular paper is great for sketching your designs before committing to the final product.
Essential Tools and Supplies
To craft your pop-up card, gather these essential tools:
- Scalpel Knife: A sharp knife for precise cuts.
- Cutting Mat: Protects your work surface while cutting.
- Scoring Tool: Helps create clean folds without cutting through the paper.
- Ruler: For straight lines and accurate measurements.
- Glue: Use white glue or double-sided tape for a clean finish.
Decorative Elements to Consider
Adding personal touches can make your card unique:
- Stickers and Embellishments: These can enhance your design and add dimension.
- Markers and Colored Pencils: Use these for drawing or coloring your designs.
- Personal Photos: Incorporating photos can make your card even more special.
Remember, the right materials can transform your pop-up card from simple to stunning! With Cut Pop Up products, you can easily find everything you need to create beautiful cards that impress. Why not give them a try?
Designing Your Pop Up Card Layout
Creating a pop-up card is not just about cutting and folding; it’s about bringing your imagination to life. The layout is the foundation of your card, guiding how your design will unfold. Here’s how to get started:
Sketching Your Design
- Start with a rough sketch of your card layout. This helps visualize the final product.
- Consider the pop-up elements you want to include. Will it be a flower, a birthday cake, or something else?
- Think about the size and placement of each element to ensure they fit well when the card is opened.
Planning the Pop Up Mechanism
- Decide on the type of pop-up mechanism you want to use. Here are a few options:
- Tab Mechanism: Simple and effective for beginners.
- Box Pop Up: Adds depth and dimension.
- Layered Pop Ups: For more complex designs.
- Make sure your mechanism is sturdy enough to hold the pop-up elements securely.
Choosing a Theme
- Select a theme that resonates with the occasion. Here are some ideas:
- Birthday: Bright colors and fun shapes.
- Holidays: Seasonal elements like snowflakes or pumpkins.
- Personalized: Incorporate photos or messages that are meaningful to the recipient.
Remember, the key to a successful pop-up card is creativity and planning. Take your time to design a layout that reflects your style and the message you want to convey.
By focusing on these aspects, you can create a pop-up card that not only looks great but also carries a personal touch. If you’re looking for creative ideas for do-it-yourself pop-up cards, check out Cut Pop Up products for inspiration and materials that can elevate your crafting experience!
Cutting and Folding Techniques
Creating a pop-up card is an exciting way to express your creativity. Mastering cutting and folding techniques is essential for bringing your designs to life. In this section, we will explore the fundamental skills needed to make your pop-up card stand out.
Basic Cutting Methods
- Use the Right Tools: A sharp scalpel or Xacto knife is ideal for precise cuts. Always work on a self-healing cutting mat to protect your surfaces.
- Make Clean Cuts: Ensure your cuts are straight and go from one valley fold to another. This will help your pop-up mechanism function smoothly.
- Practice on Scrap Paper: Before cutting into your final paper, practice on scrap paper to get a feel for the tools and techniques.
Creating Folds for the Pop Up
- Mountain and Valley Folds: Understand the difference between mountain folds (which peak upwards) and valley folds (which dip downwards). These folds are crucial for the pop-up effect.
- Score Before You Fold: Scoring your paper lightly with a scoring tool or a blunt object helps create clean, precise folds. This technique is especially useful for intricate designs.
- Use a Bone Folder: A bone folder can help you achieve sharp, professional-looking folds. It’s a handy tool for anyone serious about card making.
Using a Bone Folder for Precision
- What is a Bone Folder?: This tool is used to create crisp folds and can also help in burnishing the paper for a smooth finish.
- How to Use It: Place the bone folder along the fold line and press down firmly. This will ensure your folds are neat and your card looks polished.
- Benefits: Using a bone folder not only improves the appearance of your card but also enhances its durability.
Remember, patience is key when crafting pop-up cards. Take your time to practice these techniques, and soon you’ll be creating beautiful pop-up cards that impress everyone!
Creating Simple Pop Up Mechanisms

Creating pop-up cards can be a fun and rewarding experience. One of the most exciting parts is designing the pop-up mechanisms that make your card come to life. In this section, we will explore some simple yet effective techniques to create pop-up mechanisms that will impress your friends and family.
Making a Basic Tab Mechanism
- Start with a folded card: Take a piece of card stock and fold it in half. This will be the base of your pop-up card.
- Cut slits for the tab: Make two parallel cuts about one inch long on the folded edge of the card. These cuts will create a tab that will pop up when the card is opened.
- Push the tab: Open the card and gently push the tab outwards. This will create the first pop-up element of your card.
Designing a Box Pop Up
- Create a box shape: To make a box pop-up, cut a rectangular piece of paper and fold it into a box shape. Attach it to the base of your card using tabs.
- Add decorations: You can decorate the box with drawings or stickers to make it more appealing.
- Secure it well: Make sure the box is securely attached so it pops up smoothly when the card is opened.
Incorporating Multiple Layers
- Layering for depth: To create a more complex design, consider adding multiple layers of pop-ups. Each layer can be a different shape or size, creating a 3D effect.
- Use different colors: Using various colors for each layer can enhance the visual appeal of your card.
- Plan your layout: Before cutting, sketch out your design to ensure everything fits well together.
Remember, crafting pop-up cards is all about creativity and fun! Don’t be afraid to experiment with different shapes and mechanisms. The more you practice, the better your designs will become.
By mastering these simple mechanisms, you can elevate your pop-up card designs and impress everyone with your creativity. If you’re looking for more inspiration, check out Cut Pop Up Products for unique designs and materials that can help you take your pop-up card crafting to the next level!
Adding Decorative Elements
When it comes to making your pop-up card truly special, decorative elements play a vital role. They can transform a simple card into a memorable keepsake. Here’s how to enhance your creation:
Using Stickers and Embellishments
- Stickers can add a fun touch. Choose themes that match your card’s purpose.
- Embellishments like ribbons or sequins can create texture and depth.
- Consider using 3D stickers for an extra pop!
Drawing and Coloring
- Use colored pencils or markers to add personal touches.
- Create backgrounds or borders to frame your pop-up elements.
- Experiment with shading to give your designs a more dynamic look.
Adding Text and Messages
- Handwritten messages can make your card feel more personal.
- Use decorative fonts or calligraphy for a stylish touch.
- Consider including a heartfelt quote or a special date.
Remember, the key to a great pop-up card is to start simple and then add layers. This approach allows you to build complexity without feeling overwhelmed.
By incorporating these decorative elements, you can elevate your pop-up card from ordinary to extraordinary. If you’re looking for creative ways to learn how to make a pop up in a card, check out Cut Pop Up products for inspiration and supplies! They offer a range of materials that can help you bring your ideas to life, making the crafting process enjoyable and rewarding.
Advanced Pop Up Card Techniques
Creating pop-up cards can be a delightful way to express creativity. Cut Pop Up products offer a unique twist on traditional card-making, allowing you to explore advanced techniques that can elevate your designs. Here’s how you can take your pop-up card skills to the next level:
Creating Complex Pop Up Structures
- Layering: Use multiple layers of paper to create depth. This can make your card look more dynamic and interesting.
- Intricate Designs: Experiment with detailed cutouts that reveal hidden images or messages when the card is opened.
- 3D Elements: Incorporate three-dimensional shapes that stand out from the card, adding a surprising element.
Incorporating Movement
- Sliding Mechanisms: Create cards where elements slide out when opened, adding an interactive touch.
- Spinning Features: Design parts of your card that can spin or rotate, making it more engaging.
- Pop-Up Surprises: Use hidden tabs that reveal additional pop-up elements when the card is opened fully.
Using Templates and Patterns
- Pre-made Templates: Consider using templates from Cut Pop Up to simplify the process. These can guide you in creating complex designs without starting from scratch.
- Custom Patterns: Design your own patterns to personalize your cards. This can make your creations truly unique.
- Practice with Different Materials: Experiment with various types of paper and embellishments to see how they affect your designs.
Crafting pop-up cards is not just about the final product; it’s about enjoying the process and expressing your creativity. Let your imagination guide you as you explore these advanced techniques!
Personalizing Your Pop Up Card

Creating a pop-up card is not just about the mechanics; it’s also about making it special for the person receiving it. Personalization adds a unique touch that can turn a simple card into a cherished keepsake. Here are some ways to make your pop-up card truly yours:
Tailoring the Card to the Recipient
- Think about the recipient’s interests. Do they love animals, sports, or a specific color?
- Use their favorite colors in the design to make it more appealing.
- Consider their hobbies or passions when choosing the pop-up image.
Adding Personal Photos
- Incorporate a small photo of a memorable moment you shared.
- Use photo corners to attach the picture securely without damaging it.
- This adds a personal touch that can evoke fond memories.
Writing a Heartfelt Message
- A simple, heartfelt message can mean a lot. Write something that reflects your feelings.
- Use decorative pens or markers to make your message stand out.
- Consider adding a quote that resonates with your relationship.
Personalizing your pop-up card not only shows effort but also conveys your feelings in a creative way. It’s a wonderful opportunity to express love and appreciation.
By focusing on these elements, you can create a pop-up card that is not only visually appealing but also deeply meaningful. If you’re looking for templates to make a pop-up card, check out Cut Pop Up products for easy-to-use designs that can help you craft the perfect card. With the right tools, you can bring your creative ideas to life effortlessly!
Tips for Crafting with Kids

Crafting pop-up cards is a fantastic way to bond with children while sparking their creativity. Here are some helpful tips to make the experience enjoyable and safe:
Choosing Kid-Friendly Materials
- Use sturdy paper: Opt for cardstock or construction paper that can withstand handling.
- Non-toxic supplies: Ensure that all glue, markers, and decorations are safe for kids.
- Pre-cut pieces: Prepare some card elements in advance to minimize the use of scissors.
Supervising Cutting and Folding
- Always supervise: Keep an eye on kids when they are using scissors to prevent accidents.
- Demonstrate techniques: Show them how to cut and fold properly to avoid frustration.
- Encourage teamwork: Work together on more complex cuts or folds to build confidence.
Encouraging Creativity
- Brainstorm themes: Discuss ideas for card themes, like birthdays or holidays, to inspire them.
- Let them choose decorations: Allow kids to pick stickers, colors, and designs to personalize their cards.
- Celebrate their creations: Display their finished cards proudly to boost their confidence.
Crafting pop-up cards not only enhances creativity but also strengthens family bonds. It’s a wonderful way to express love and thoughtfulness through handmade gifts.
By following these tips, you can create a fun and safe crafting environment that encourages kids to explore their artistic side. Plus, with Cut Pop Up products, you can elevate your card-making experience, making it even more enjoyable and rewarding!
Troubleshooting Common Issues
Creating pop-up cards can be a delightful experience, but sometimes things don’t go as planned. Here are some common issues you might face and how to fix them:
Fixing Misaligned Pop Ups
- Check your measurements: Ensure that your cuts and folds are precise. Misalignment often comes from uneven cuts.
- Adjust the base: If the pop-up doesn’t sit right, try adjusting the base of the card. Sometimes a small tweak can make a big difference.
- Reinforce with glue: If the pop-up is still misaligned, a little glue can help secure it in place.
Reinforcing Weak Points
- Use thicker paper: If your pop-up feels flimsy, consider using a sturdier paper for the pop-up elements.
- Add support: You can add small tabs or extra folds to give your pop-up more strength.
- Test before finalizing: Always test the mechanism before gluing everything down to ensure it works smoothly.
Ensuring Smooth Folding
- Pre-fold your lines: Before making the final folds, pre-fold the lines to create a crease. This helps in achieving a cleaner fold.
- Use a bone folder: A bone folder can help you make precise and clean folds, ensuring your card looks professional.
- Practice patience: Sometimes, it takes a few tries to get the folding just right. Don’t rush the process!
Remember, crafting is about creativity and fun! If something doesn’t work out, don’t be afraid to try again or make adjustments.
By addressing these common issues, you can enhance your pop-up card-making experience. For more tips and tricks, explore the Cut Pop Up products that offer a variety of guides and materials to help you create stunning pop-up cards for any occasion!
Showcasing and Sharing Your Pop Up Cards
Creating pop-up cards is not just about crafting; it’s about sharing joy and creativity with others. Once you’ve made your unique designs, it’s time to showcase them! Here are some fun ways to display and share your pop-up cards:
Creating a Display for Your Cards
- Use a Shadow Box: A shadow box can beautifully frame your pop-up cards, making them a stunning piece of art.
- Card Stands: Invest in small card stands to showcase your cards on tables or shelves.
- Wall Display: Create a gallery wall with your pop-up cards, rotating them seasonally or for special occasions.
Sharing on Social Media
- Instagram Stories: Share short videos of your cards in action, showing how they pop up!
- Crafting Groups: Join online crafting communities to share your creations and get feedback.
- Hashtags: Use hashtags like #PopUpCards and #CutPopUp to connect with other crafters.
Gifting and Mailing Tips
- Personal Touch: Include a handwritten note with your card to make it extra special.
- Custom Envelopes: Create matching envelopes to enhance the presentation of your pop-up cards.
- Mailing: Use sturdy materials to ensure your pop-up cards arrive in perfect condition.
Pop-up cards are a delightful way to express creativity and love. Whether for birthdays, holidays, or just because, they bring smiles to everyone who receives them. Explore creative ways to learn how to make pop up cards for birthday celebrations and let your imagination soar! With Cut Pop Up products, you can easily craft stunning cards that will impress your friends and family. Don’t miss out on the chance to create something magical!
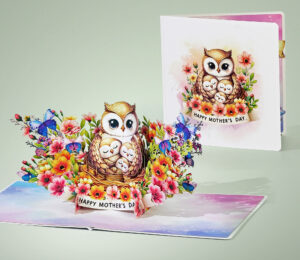
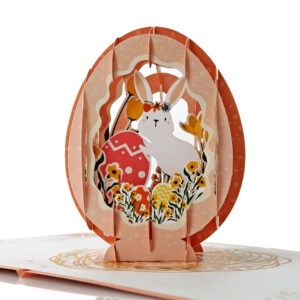
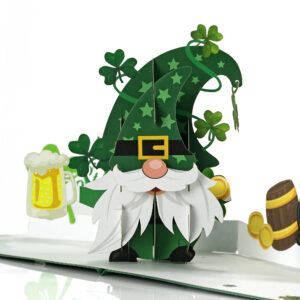
Exploring Pop Up Card Inspirations
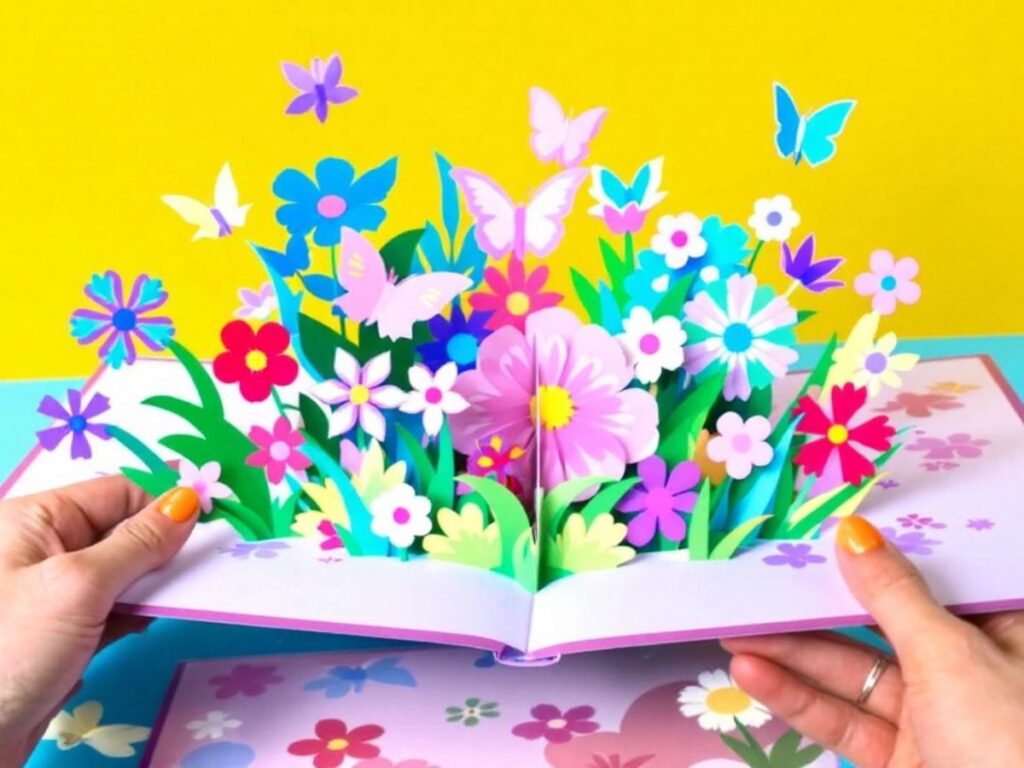
Pop Up Cards are a delightful way to express creativity and emotions. They add a special touch to any occasion, making your greetings memorable. Cut Pop Up cards take this creativity a step further, offering unique designs that can truly wow the recipient.
Seasonal and Holiday Themes
- Christmas: Create a winter wonderland with snowflakes and Santa.
- Halloween: Design spooky pop-ups like ghosts or pumpkins.
- Valentine’s Day: Use hearts and flowers to show love.
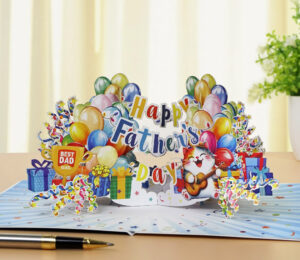
Special Occasion Ideas
- Birthdays: Surprise someone with a pop-up cake or balloons. Check out 18 DIY birthday card ideas that show how much you care.
- Weddings: Craft elegant designs featuring rings or floral arrangements.
- Graduations: Celebrate achievements with caps and diplomas.
Creative and Unique Designs
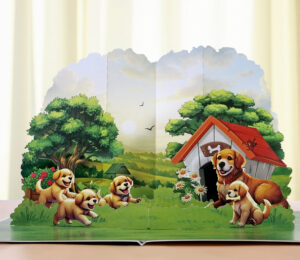
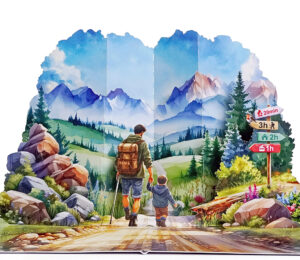
- Nature Themes: Incorporate trees, animals, or landscapes.
- Fantasy: Bring to life dragons, fairies, or magical castles.
- Personalized Touches: Add photos or messages that resonate with the recipient.
Crafting pop-up cards is not just about the final product; it’s about the joy of creating something special. With Cut Pop Up products, you can explore endless possibilities and make your cards stand out.
Whether you’re a beginner or an experienced crafter, these inspirations can help you create beautiful pop-up cards that leave a lasting impression. Dive into the world of pop-up cards and let your imagination soar!
Dive into the world of pop-up cards and discover unique designs that can brighten anyone’s day! Whether you’re looking for a special gift or just want to explore creative ideas, our collection has something for everyone. Visit our website to see all the amazing options we offer!
Wrapping Up Your Pop-Up Card Journey
Creating a pop-up card is not just about crafting; it’s about sharing joy and creativity. As you’ve learned, this fun project can be a wonderful way to express your feelings for someone special. Whether you’re making a card for a birthday, a holiday, or just to say ‘I care,’ the process allows you to personalize your message in a unique way. Remember, the best part is that there are no strict rules—let your imagination run wild! So gather your materials, invite some friends or family to join in, and start making your own beautiful pop-up cards. Happy crafting!
Frequently Asked Questions
What materials do I need to make a pop-up card?
You will need cardstock or thick paper, scissors, glue, and decorations like markers or stickers.
Can kids help with making pop-up cards?
Yes! Making pop-up cards is a fun activity for kids, but make sure to supervise them when using scissors.
How do I create a pop-up effect?
You can create a pop-up by cutting slits in the card and folding tabs that stand up when the card opens.
What themes can I use for my pop-up card?
You can choose any theme, like birthdays, holidays, or even personal interests like animals or flowers.
Is it hard to make a pop-up card?
No, making a pop-up card can be easy and fun, especially with simple designs.
Can I use a store-bought card for pop-up designs?
Yes, you can add pop-up elements to a card you already have by creating tabs.
What should I write inside my pop-up card?
A heartfelt message or a personal note is always a great choice!
Where can I find inspiration for my pop-up cards?
You can look online for tutorials, images, or ideas to spark your creativity.


I never thought about it that way—great perspective.